Thursday, February 7, 2013

Walking the Plank

Painting the upstairs and downstairs hallways was a relatively boring but necessary task.  I couldn't settle on a color since it's visible from just about every room in the house so we went with the white color we have been using on the ceilings and trim (Sherwin Williams Creamy). The walls were ugly and marked up from the installation of the new heat pump when we moved in and we wanted to get them painted before the new carpet is installed.  We painted all of the trim when we worked on the bedroom so we taped off all of the trim and started painting the walls and ceilings.


Stairwells are the hardest.  Andy setup this plank propped up on a ladder...

And started painting...

I refilled the rollers on the other side of the knee wall so he didn't have to walk back and forth on the plank.


 So, here it is...in all of its clean brightness.  A bit boring, but so much better than dinged and marked up walls.  Once we get carpet we'll put something fun on the walls.

And a sneak peak of the new doors.  A painful and tedious job for Andy, but totally worth it. 


Tuesday, February 5, 2013

Reclaiming the Wall

With the new doorbell installed we decided to remove the louvered door between the hall and the kitchen (since we have never closed it in the two years we've lived here) and expose another wall.

The hallway feels so much larger and more open with the door gone, but that meant that we had some repair work to do to the door frame before we painted.

There was a very rough transition between the years of paint and the raw wood where the trim for the door was attached and we also had to do some repair work on the sections of the frame that were routed out for the hinges.

Andy glued in these makeshift shims so that we could sand everything flat and re-paint.

The areas were covered and clamped to ensure that the positioning was correct.

With all of the paint removed and the holes filled and sanded it was starting to look much better.


It looks even better now that it is primed and ready for paint. 

You can't even see where the old hinges used to be.


Friday, February 1, 2013

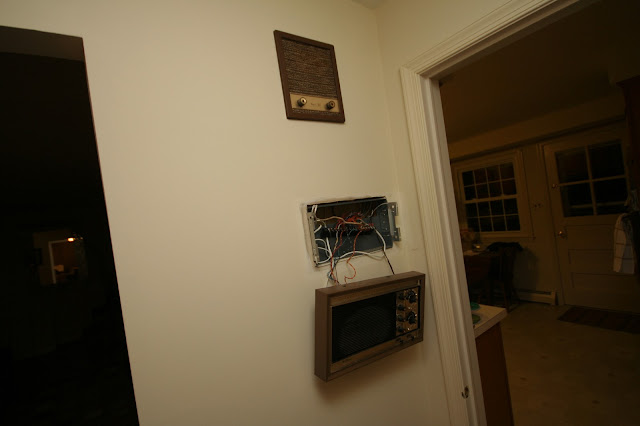
Ding Dong the Witch is Dead

With the drywall patched in the downstairs hall Andy wanted to get the new doorbell installed before we painted.


The new button matches the hardware on the new front door (I'll post about that soon) in oil-rubbed bronze.

(this could be the last photo of the old front door -- yippee!)
The wiring was a little tricky because Andy primed over all of the notes he wrote on the wall.  It's nice to have a regular doorbell.

And much better than the before shot.

Wednesday, January 23, 2013

Bonjour French Cleat


 With the bedroom finally painted we decided to mount the headboard we made here to the wall instead of to the bed frame.  Andy did some research and decided that a French cleat was the best option so he planned one using a 2x4.


We measured to fit it between the existing supports.

Mounted part to the wall

And checked for level.


Since we are mounting the headboard to the wall it doesn't need legs anymore.


From the front it really doesn't look any different

But from the side it is mounted flush with the wall and is a huge improvement over the original design.

Tuesday, January 15, 2013

Rolling On

Andy and I both took some extra time off around New Year's to focus on getting the bedroom and hall painted in preparation for new carpet.

We want to add some color to the rooms (no more contractor cream or builder beige) and we have big plans for some bold color (coming soon) but in the bedroom we decided to keep it simple.  We decided on Sherwin Williams Accessible Beige. 


The current painting projects include EVERYTHING -- ceiling, walls, and trim (oh, how I hate painting ceilings!), so it's a multi-day process for us.

The first day we removed all of the old carpet in the hall to make painting the new trim easier. First this happened.


 And then this happened because Kodak is somewhat terrified of hardwood floor and wouldn't come upstairs. What you can't see is that I even had to put a non-slip mat under the rugs to get him to come up.

The real prepwork started early the following day. We moved the furniture and tested some paint on the area where the border used to be.  Andy had to use vinegar and some sanding to remove the residual glue. We painted the ceiling and trim the same day.


And the next day were were finally able to paint the walls and reclaim our bedroom.


Monday, December 31, 2012

Where are the Chickens?

Andy wants to own chickens someday, but I promise that our recent purchase of chicken wire had nothing to do with actual chickens.  This post is late since Christmas is over and it's almost January, but these are too fun not to share.  

In an effort to find a way to decorate our red maple tree by the driveway we thought it would be fun to try to hang lighted Christmas balls in the tree.  I searched for weeks for large grapevine balls to wrap lights around but found none at local stores and the ones online were extremely expensive.  After some additional web searching I found this tutorial to make lighted Christmas balls out of chicken wire.  

The process is relatively simple but it took a little bit of practice to figure out how to get a somewhat round ball (hence no pictures of the actual construction).  We managed to make eight balls, each with 200 lights.  Some of the pictures are a little blurry, but you get the idea.  We are pleased with them and hope to make more to add to the collection next year.