Sunday, March 18, 2012

We Have Closets (With Doors!!!)

I'm pretty sure that the bifold doors for the closets in the master bathroom and bedroom were one of the first purchases we made.  They have been sitting in the office for months!  With the drywall and painting finished we could finally install them.  Andy got the door on his closet.  It still needs trim and the door needs painted, but at least we have functioning doors!


Installing the door jam in the bathroom.

 Can't wait to build some shelves and actually use this space!

Friday, March 16, 2012

Filling In the Cracks

We probably could have grouted the tile one night after work, but after our marathon tiling session we needed a break.  We waited until this past weekend to install the grout.

Andy took this job on himself.  It's a small space and it was easier for just one person to grout the floor tiles.


We love the results!!  Now we have to tile the tub surround.


Monday, March 12, 2012

Floor Tile

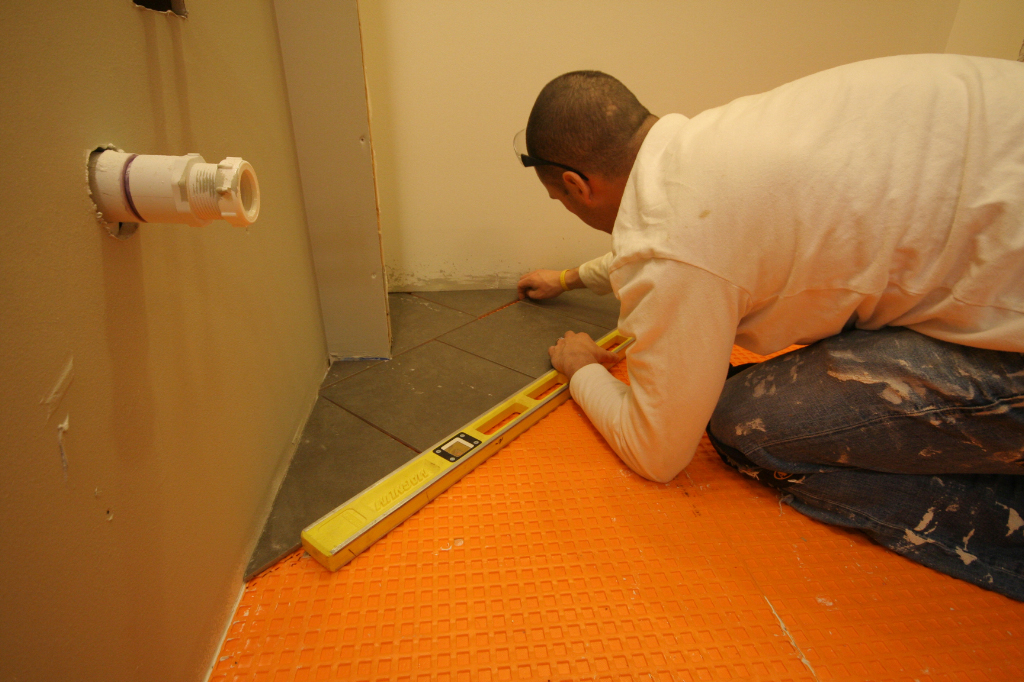
Last weekend we spent all day Saturday (12 hours!) installing the floor tile in the master bathroom.  We have 12x12" tile and used a brick pattern on a diagonal.  We knew that this pattern would make more cuts and take longer to install, but we heard from several people that straight lines in a long, narrow space, can really highlight imperfections.  Originally I wanted the diagonals to run the other direction (If you're a Manning or related to one, you can appreciate that tile, like fish in a wall sculpture, can go the "right way" or the "wrong way")  Basically, our tiles are "swimming" the wrong direction, but there was absolutely no way to install them in that direction without tiling yourself into a corner.  Andy would have had to live in the bathroom (minus the toilet) for 24 hours until the thinset dried!

We dry laid the first few rows to practice some of the cuts and work in the closet before we mixed the thinset and had to start laying the tile.


Andy borrowed a tile saw from a co-worker (thanks to JM!) and we set it up over the bathtub so that we didn't have to truck up and down the steps and out to the garage to make all of the cuts.

The "affectionately" named dinosaur tile!

It took us a few tries to get a system down, but by this point we had it down to a science.  We would measure and make all of the necessary cuts, Andy applied the thinset, and then I laid the tiles.

It actually took two days to do all of the tile 1)because we were too tired to finish it Saturday night, and 2) it was easier to work in the small space since we could walk on the tile we installed on Saturday.

All done and ready for grout!


Sunday, March 11, 2012

Vanity Lights

I searched for months for lights to put above the new vanities.  The big box stores didn't have anything we liked so we tried some smaller lighting stores in the area -- still nothing.  I looked online and even bought some that I ended up sending back.  We knew we wanted a 3-light fixture and it had to be relatively short (our vanities are only 30 inches wide).  Some of the lights that we liked looked too white next to our off-white cabinets, so I just kept looking.  I finally found these at Yale Electric.   We can't wait to see them with the vanities in place, but for now we just wanted more light to install the floor tile.

The middle light bulb in this fixture is another LED bulb (the rest are incandescent bulbs).  The LED bulb is way too blue for the bathroom lighting.  We'll stick to incandescent bulbs for this room.  Overall we really like the concept of the LED bulbs, but we're not completely sold yet.  We tried several in the bathroom and family room.  The color varies greatly and some of them make a very faint buzzing noise.  The technology is still very new so I think we'll wait a little while and try them again once some of the bugs are worked out. 

Friday, March 9, 2012

Master Bathroom Updates

I am way behind on my blogging.  Apparently we are doing work around the house faster than I can write about it.  I'm an engineer because I like numbers a lot more than words and the writing part of this whole blog thing is not my favorite, but we really do love being able to look back through the blog and see what we have accomplished.  Bear with me while I try to play catch-up...

Andy was home from work a day last week and he painted the walls in the bathroom.  We picked a light grayish-greenish-taupey kind of color.  I think I need to learn how to use white balance with the camera because these pictures really don't show the true color.  On my computer these pictures make the walls look a bit sea-foamy green, but it's not all accurate.  

Neither of us are good at cutting in by hand, so it's worth it to us to take the time to tape the ceiling.

After two coats of paint Andy was able to cut the underlayment for the new tile.  We chose a product called Ditra mat in place of cement backer board.  It's lighter and supposed to be easier to install, but it is more expensive.  After using backer board in the tub surround we thought this product could be worthwhile.  The tile has been down since last weekend and while we are not unhappy with the Ditra mat, we're not sure it's worth the extra money.


After laying it all out Andy was able to attach it to the subfloor with a thin layer of thinset.


We taped a temporary plastic border to protect the newly painted walls (this picture is probably the best representation of the wall color).  It's officially ready for floor tile!

Thursday, March 8, 2012

Andy's Closet

We have both been very excited to get our closets back.  Andy currently has stuff in two different closets and we each have clothing in three different rooms.  By the time we get dressed every morning and then find socks and shoes I think we've probably walked a half mile!  

Andy's new closest is a square and he knew exactly what he wanted -- 2 bars of hanging clothes and some hooks on the side.  I, on the other hand, have drawn three different 3D models of my closet in Google SketchUp, and am looking at the 4th type of closet organization system.  I'll figure it out eventually.

On one of our weekly trips to Lowe's Andy got of the the supplies to mount in his closet and broke out his laser level to get it setup.


It's exactly what he wanted and now all of his hanging clothes are in one place!  We'll share the shoe storage and shelf space in the second closet.

Monday, March 5, 2012

A Little Bit of Primer and a Little Bit of Paint

After the drywallers finished this is what the family room ceiling looked like.

We added a coat of primer to all of the new drywall last Saturday....

And on Sunday we painted all of the ceilings and closets.

6.5 gallons of primer and paint later...
 
After one coat of paint.  The picture doesn't do the new paint justice -- it's wonderful to have a real ceiling again (with lights, too)!

Power room ceiling with finished drywall.

And after one coat of primer and one coat of paint.  We obviously still have some work to do on the walls, but the powder room renovation is another project.  At least we have a fan!
Knee wall with finished drywall.  We have real corners!  We were also very please with how they transitioned to the old wall.

This is after one coat of primer.  Painting the hallway is another project.

No more nail pops at the top of the steps!

The old closet door location.

Good-bye door!

Real corners where the new closet meets the old ceiling.

The larger of the two closets.

After a coat of primer.

Almost seemless -- we just need to pick a paint color for the bedroom to finish the new closets.

The smaller closet.